In this document
Adding a printer
This guide is for owners and managers setting up network receipt and kitchen printers. You add a printer from a staff tablet, which finds it on your Wi-Fi and checks that it prints. You then finish its setup in the back office: paper, copies, the default receipt printer and which station sends tickets to it.
Before you start
- Switch the printer on and connect it to the same Wi-Fi network as the tablet. The tablet finds printers by searching that network, and there is no way to type in a printer's address while adding it.
- Sign in on the tablet as someone allowed to manage printers. By default that is a manager or the owner. Your access level needs Manage printers, which you can check in the back office under Team → Access levels.
Open the Printers screen on a tablet
- On the Tables screen, tap the three-dot button at the top right.
- Tap Settings.
- Tap Printers.
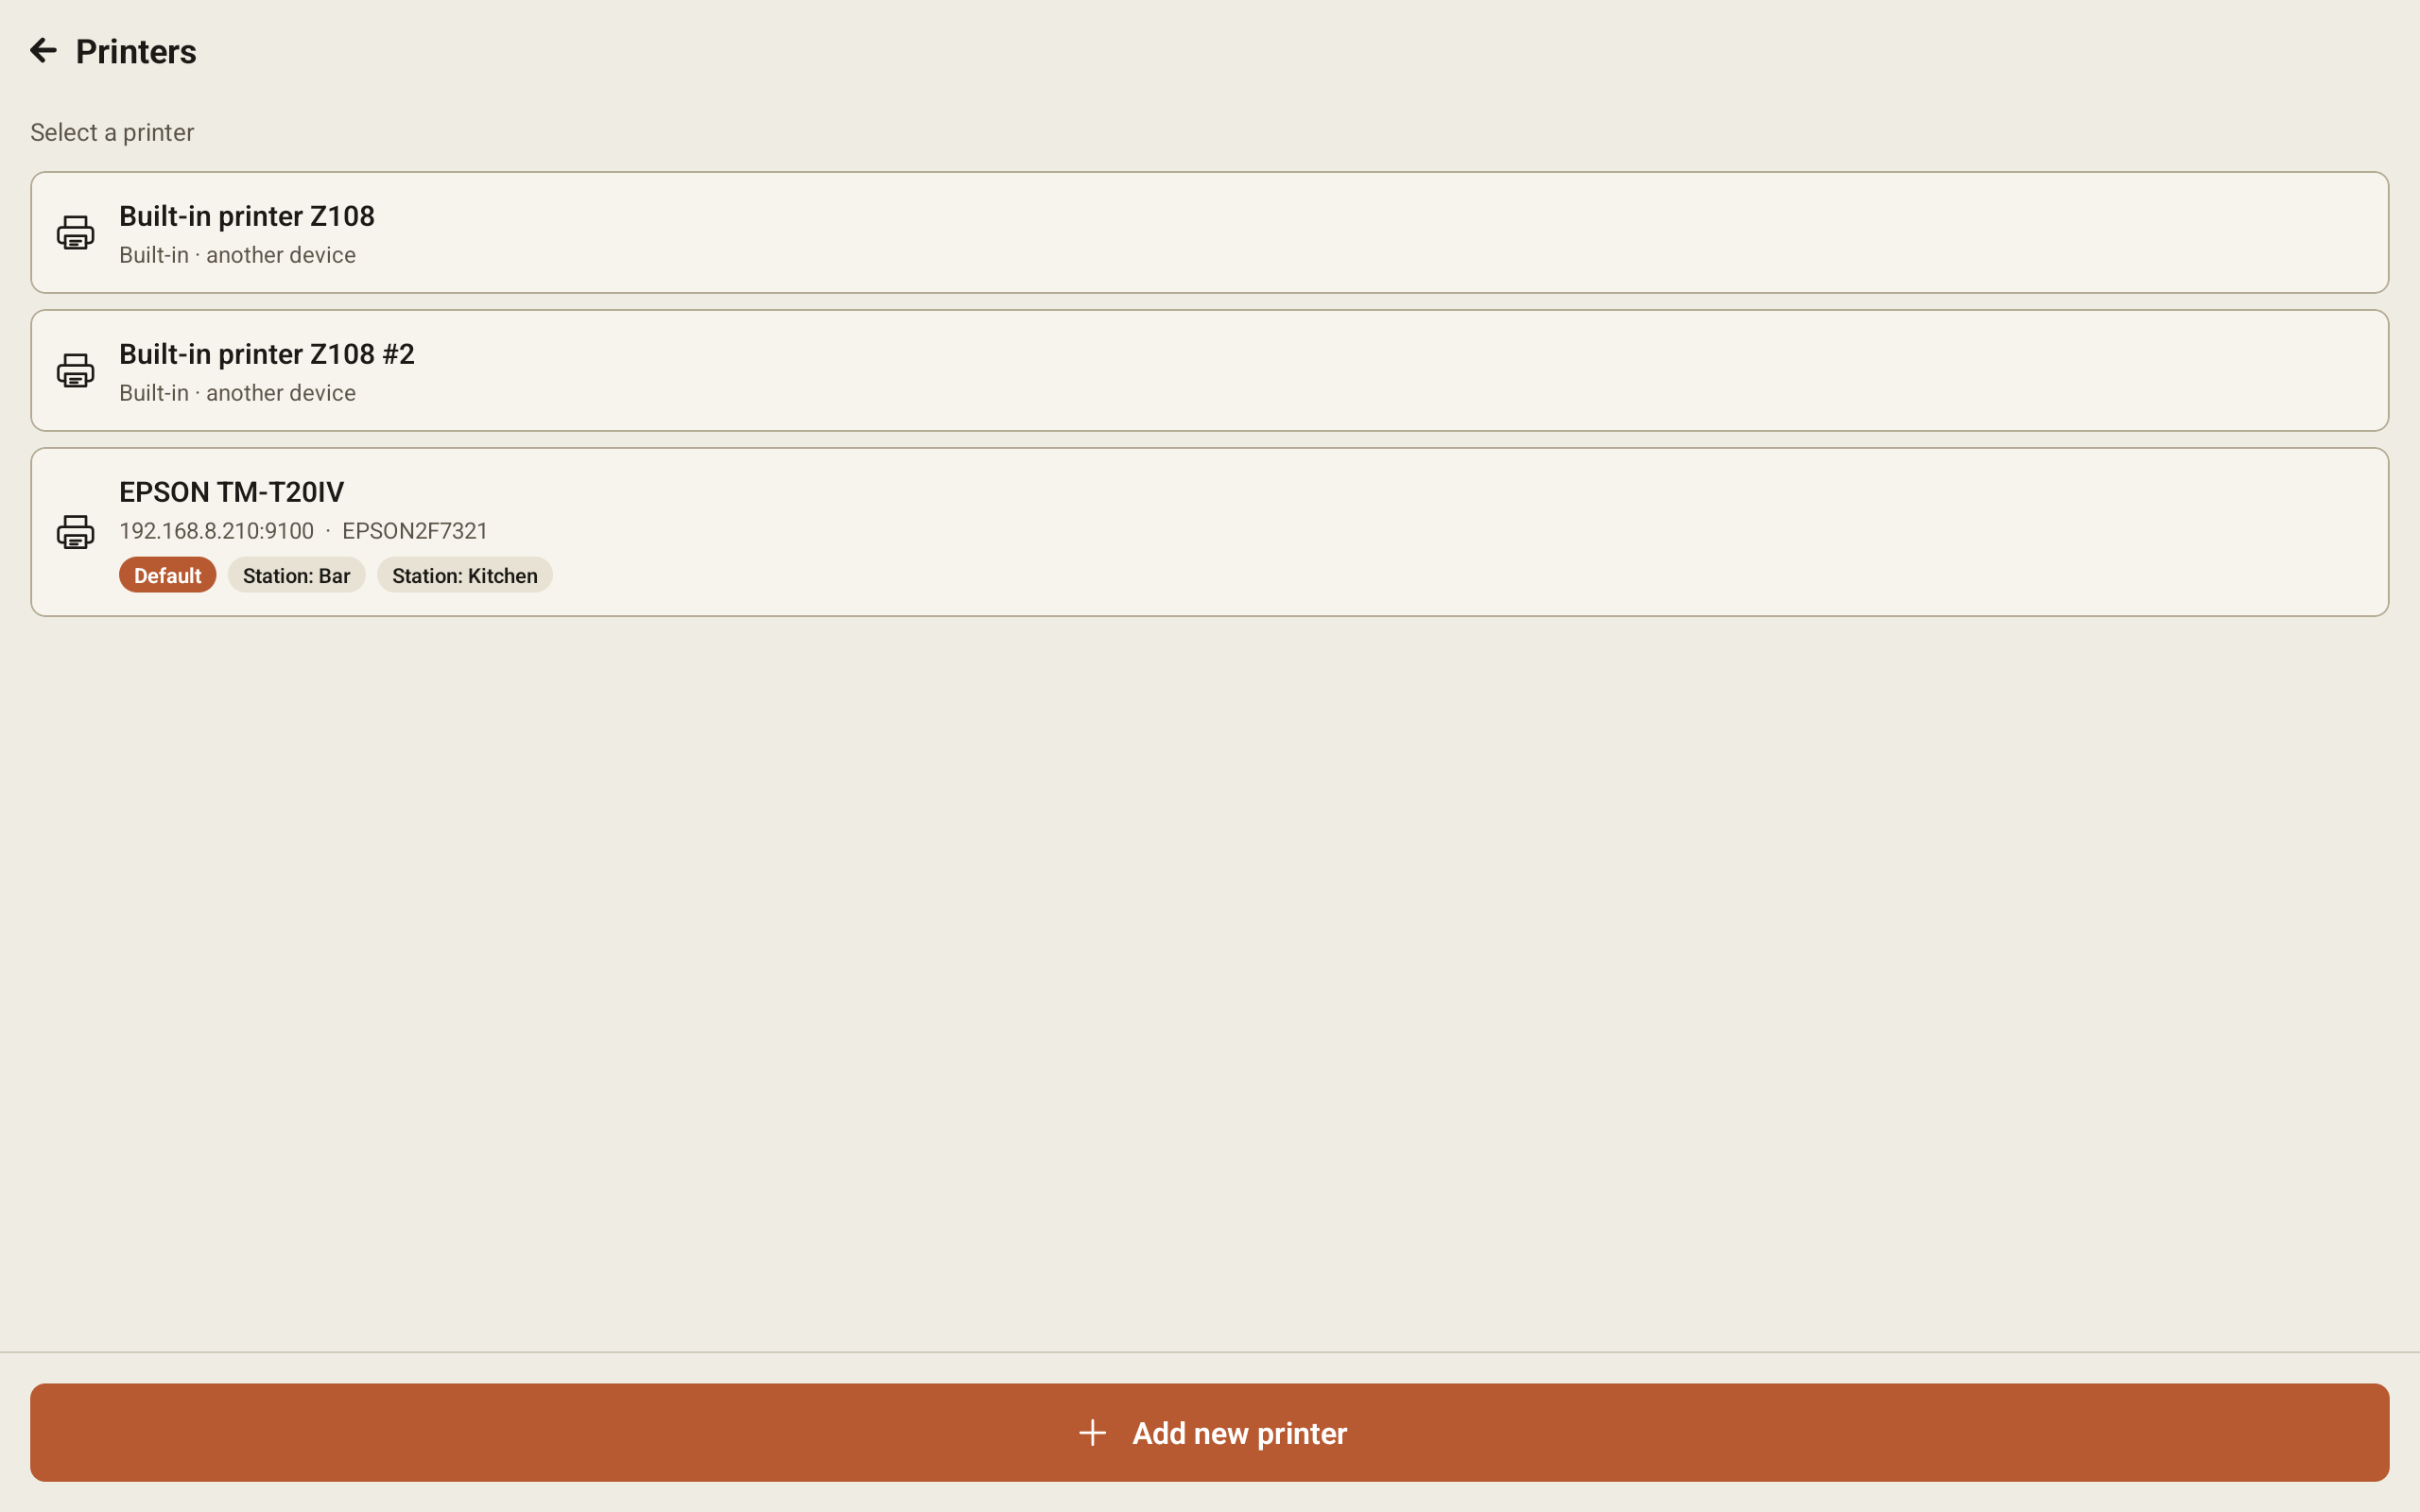
The Printers screen lists every printer your restaurant has added. Each row shows the printer's name and its address on the network. A printer built into a tablet shows Built-in · this device or Built-in · another device instead of an address. Some rows also carry chips:
- Default: this is the restaurant's default receipt printer.
- Station: and a station name: this printer prints the tickets for that station.
Choose this tablet's printer
Tap a printer in the list to make it this tablet's printer. A check mark appears next to it. Receipts printed from this tablet go to that printer. If you haven't picked one, the list says Select a printer at the top, and receipts go to the restaurant's default receipt printer instead.
The choice is saved on this tablet only. Every tablet can print to a different printer, so a terminal at the bar can print at the bar.
Any staff member can make this choice. Adding a printer is different: without Manage printers, the bottom of the screen reads Ask a manager to add a new printer. instead of showing the button.
Add a new printer
Tap Add new printer at the bottom of the Printers screen. The Add printer screen walks you through the steps, with the current step shown under the title. Tap Cancel at the bottom at any time to stop without saving.
Find printer
The tablet searches your Wi-Fi for printers and shows Looking for printers on your Wi-Fi… for a few seconds.
- If it finds printers, it lists each one with its name and address. Tap the printer you want to add.
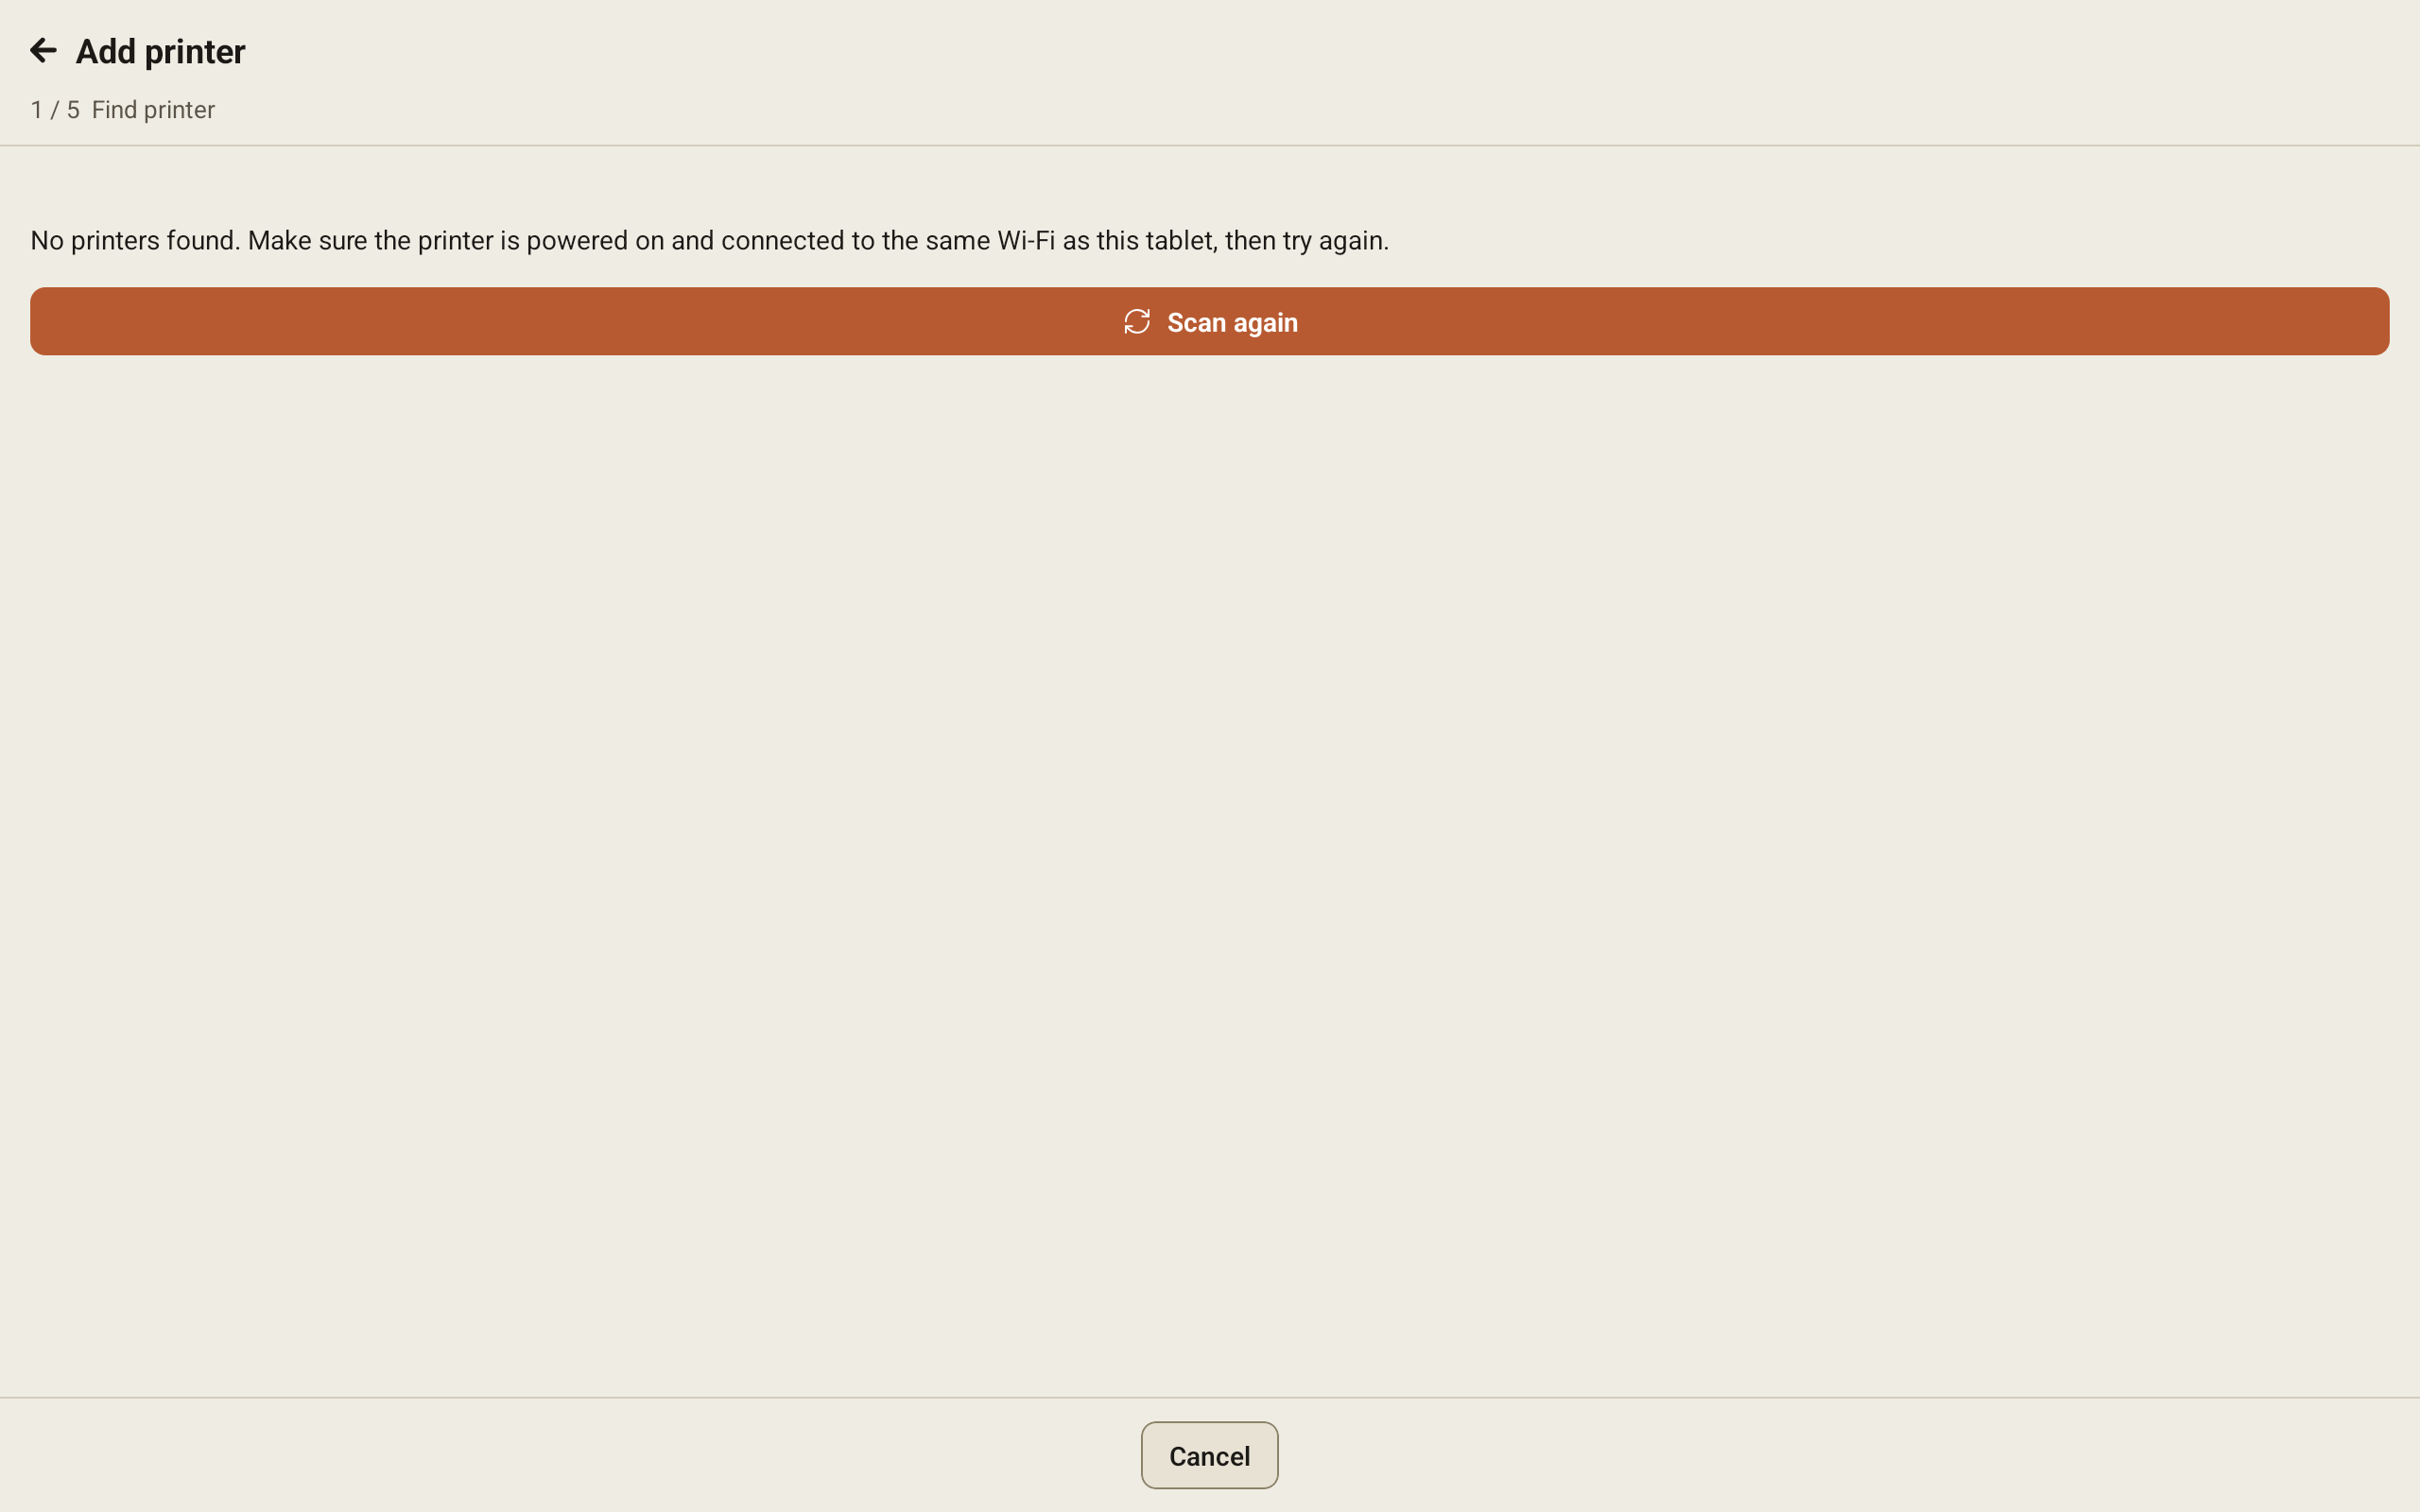
- If it finds none, it says No printers found. and asks you to check that the printer is on and connected to the same Wi-Fi as the tablet. Fix that, then tap Scan again.
Check settings
The tablet shows Checking printer settings… while it looks at how the printer is set up. On most printers this takes a moment and the wizard moves straight on to the test print. If the tablet can't reach the printer, it shows Can’t reach the printer and goes back to Find printer, so you can scan again or pick a different printer.
New EPSON printers ship with Secure Printing turned on. While it is on, the printer accepts the connection but throws away everything sent to it, so nothing prints and no error appears. If the tablet finds Secure Printing on, the step changes to Disable Secure Printing:
- Tap Open printer settings. The printer's own settings page opens in the tablet's browser.
- Accept the security warning. The page belongs to the printer, so this is expected.
- On the printer's page, go to Print → Secure Printing → Disable → Send. The printer doesn't need a restart.
- Come back to Chequo and tap I disabled it. The tablet checks the printer again.
Test print
The tablet sends a short test receipt with "chequo onboarding" printed on it, then asks Did paper come out of the printer?
- Tap Yes if the receipt printed.
- Tap No if it didn't. The tablet shows the Secure Printing instructions above, because that is the most common cause.
If the tablet can't reach the printer at all, it says so and offers Open the disable instructions, which leads to the same steps.
Name & role
- Under Name, keep the suggested name or type your own. The suggestion is built from the printer's model and the end of its address. A name like "Kitchen" or "Bar" is easier to find later.
- Under Role, tap Receipt, Kitchen or Bar.
- Tap Save printer.
The tablet saves the printer and goes back to the Printers screen, where the new printer now appears. It also appears in the back office straight away. If saving fails, the tablet shows Couldn’t save the printer and returns you to this step so you can try again.
Set up the printer in the back office
The back office is where you change a printer's details, choose the default receipt printer and connect printers to stations. You can't add a printer from the back office.
The Printers page
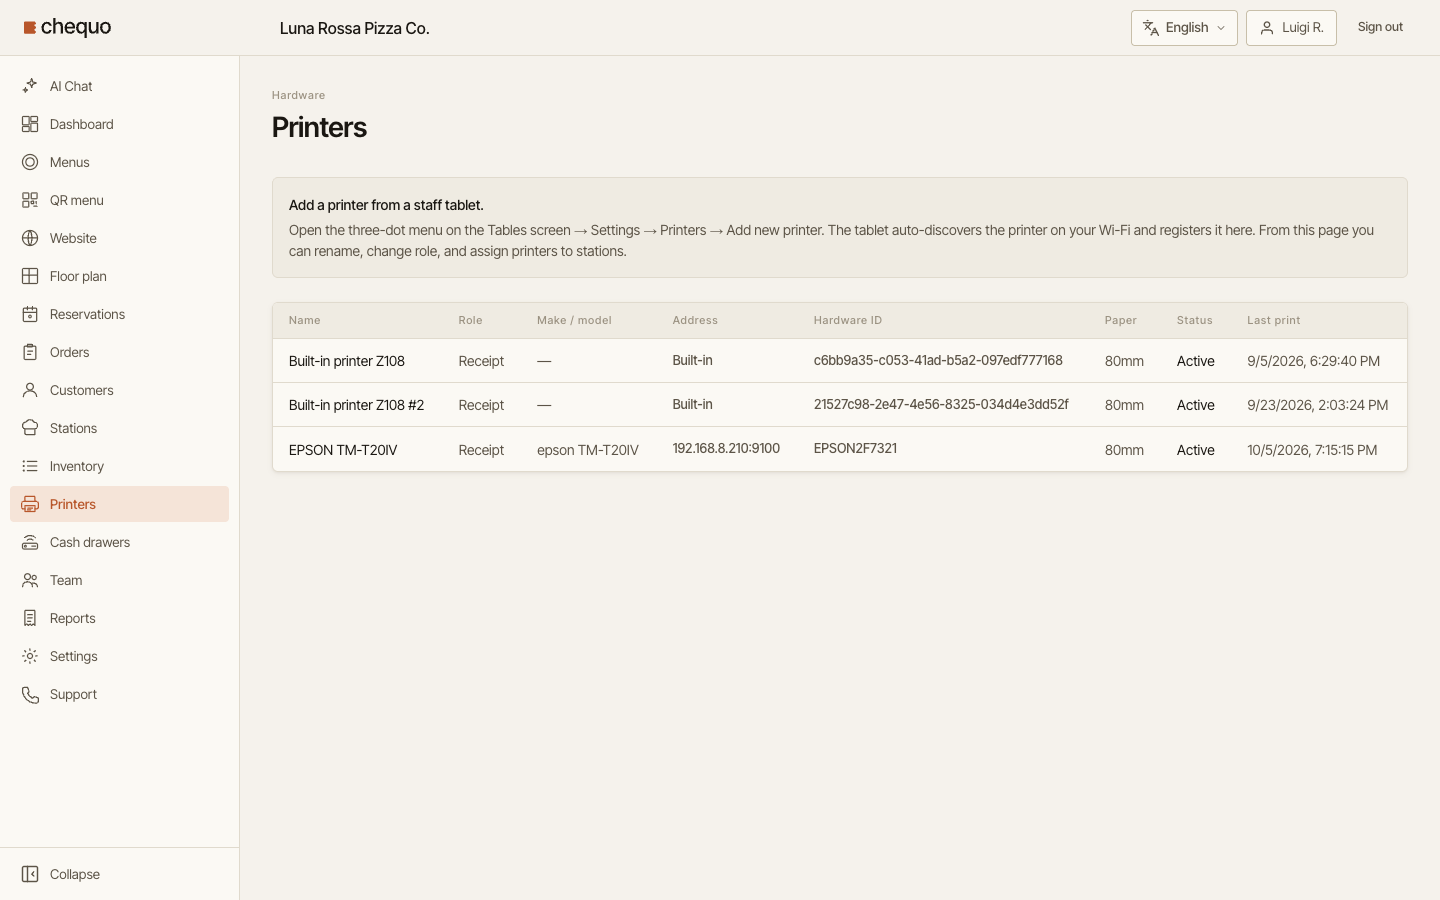
Click Printers in the sidebar. The page lists every printer with its role, make and model, address, paper width and status. A printer you have switched off reads Disabled.
Change a printer's settings
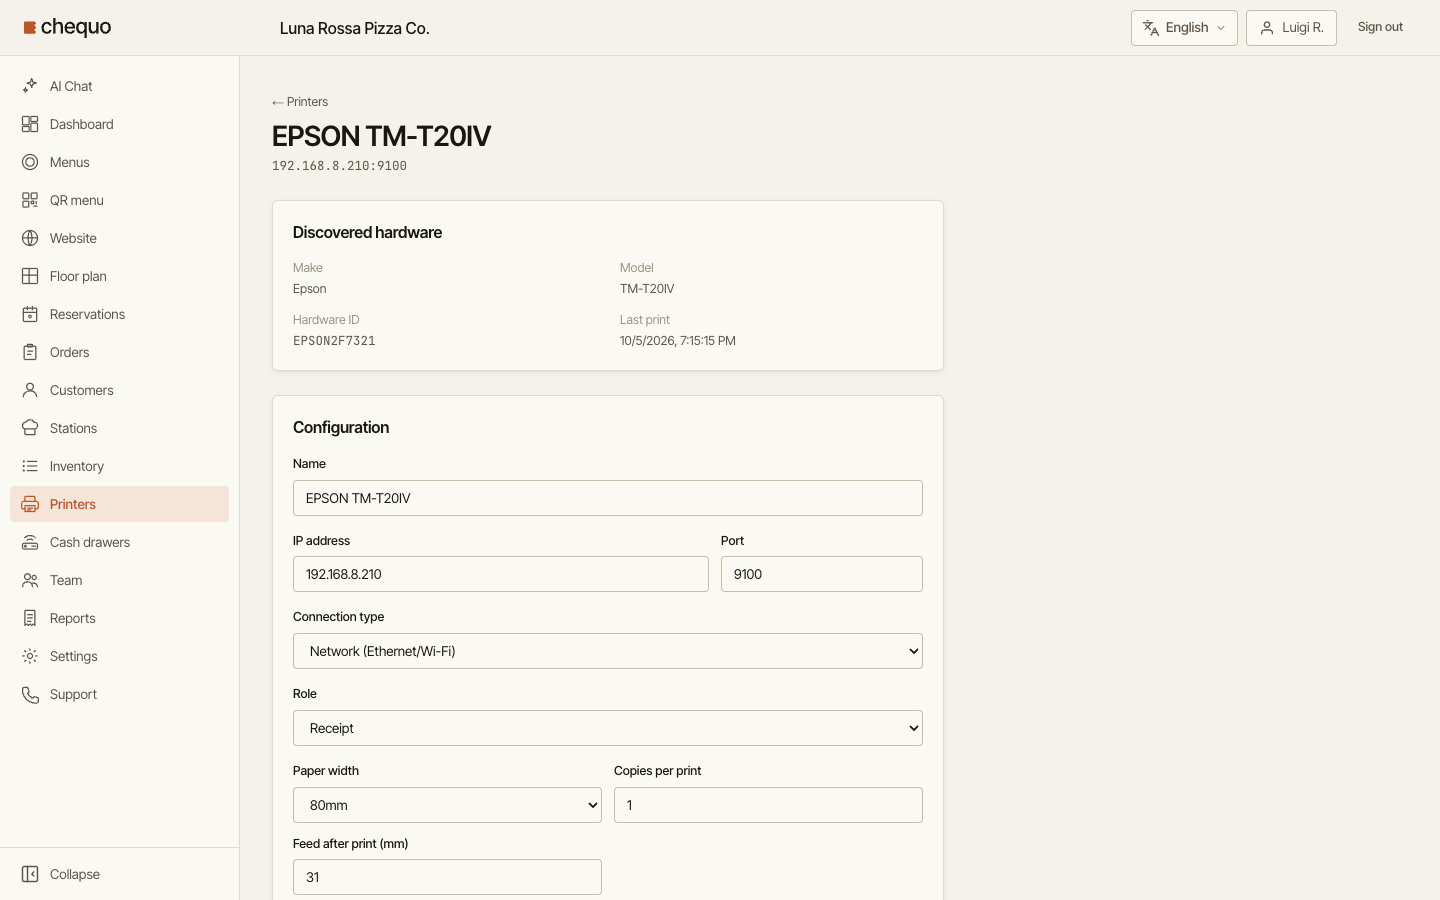
Click a printer to open its page. Under Configuration you can change:
- Name, Connection type and Role. The back office also offers Fiscal and Label roles, which the tablet doesn't.
- IP address and Port. Change these here if the printer moves to a new address on your network.
- Paper width: 80mm or 58mm.
- Copies per print: from 1 to 5.
- Feed after print (mm): how much blank paper to feed after each print, so the ticket clears the tear bar or cutter.
- Active: switch it off to stop sending anything to this printer.
- Auto-cut: switch it off for printers without a cutter.
Click Save to keep your changes.
The page also has a Cash drawer box with a Manage cash drawers link. Cash drawers are set up on their own page: see ChequoHub and cash drawers.
The page also lists the printer's recent print jobs and which tablet printed each one. If one tablet keeps failing while others print, that tablet can't reach the printer.
Send a test print
Click Test print on the printer's page. The back office can't reach your printers directly, so it hands the job to a staff tablet at the restaurant, and the tablet prints it. At least one tablet must be open in the staff app at the restaurant for this to work.
- Test print successful means paper should have come out.
- Test print failed: followed by an error means a tablet took the job but couldn't print it.
- No staff tablet picked up the print — open the staff app at the location. means no tablet took the job. Open the staff app on a tablet at the restaurant and try again.
Delete a printer
Click Delete on the printer's page and confirm. Any station using the printer loses it, so attach another printer to that station afterwards.
Choose the default receipt printer
- In the sidebar, click Settings, then Hardware.
- Under Default receipt printer, pick a printer. Only printers with the Receipt or Fiscal role are listed.
- Click Save.
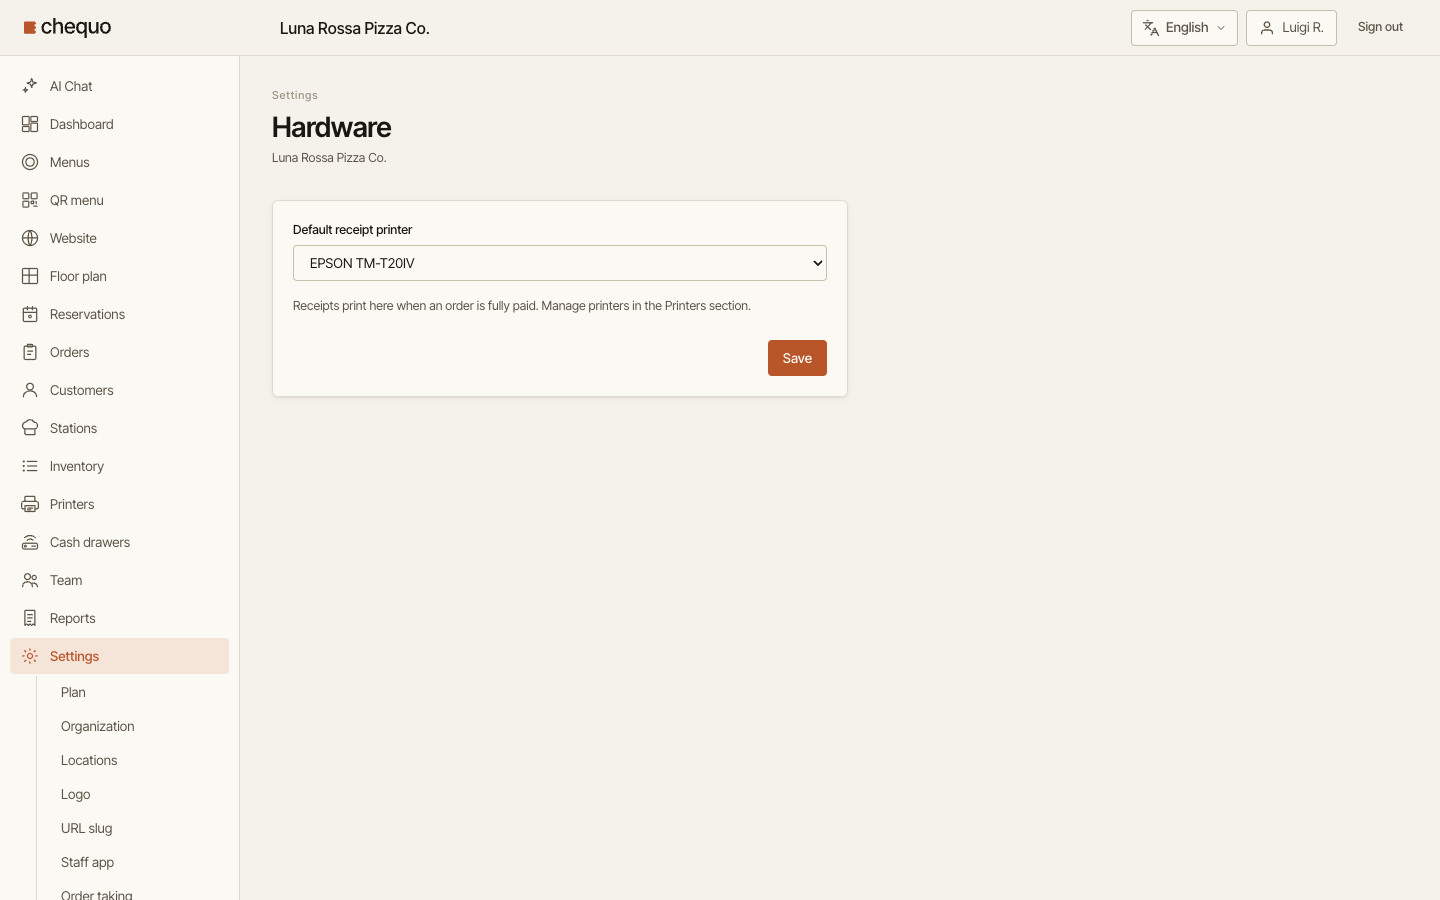
Receipts print on this printer when an order is fully paid, unless the tablet has its own printer chosen. Choose None — no automatic receipts if you don't want receipts to print on their own.
Send a station's tickets to a printer
Stations are the parts of your kitchen and bar that prepare food and drinks. If Stations isn't in your sidebar, your plan doesn't include them. To print a station's tickets:
- Click Stations in the sidebar and click a station.
- In the Printer card, pick a printer from the list. The change is saved as soon as you pick it.
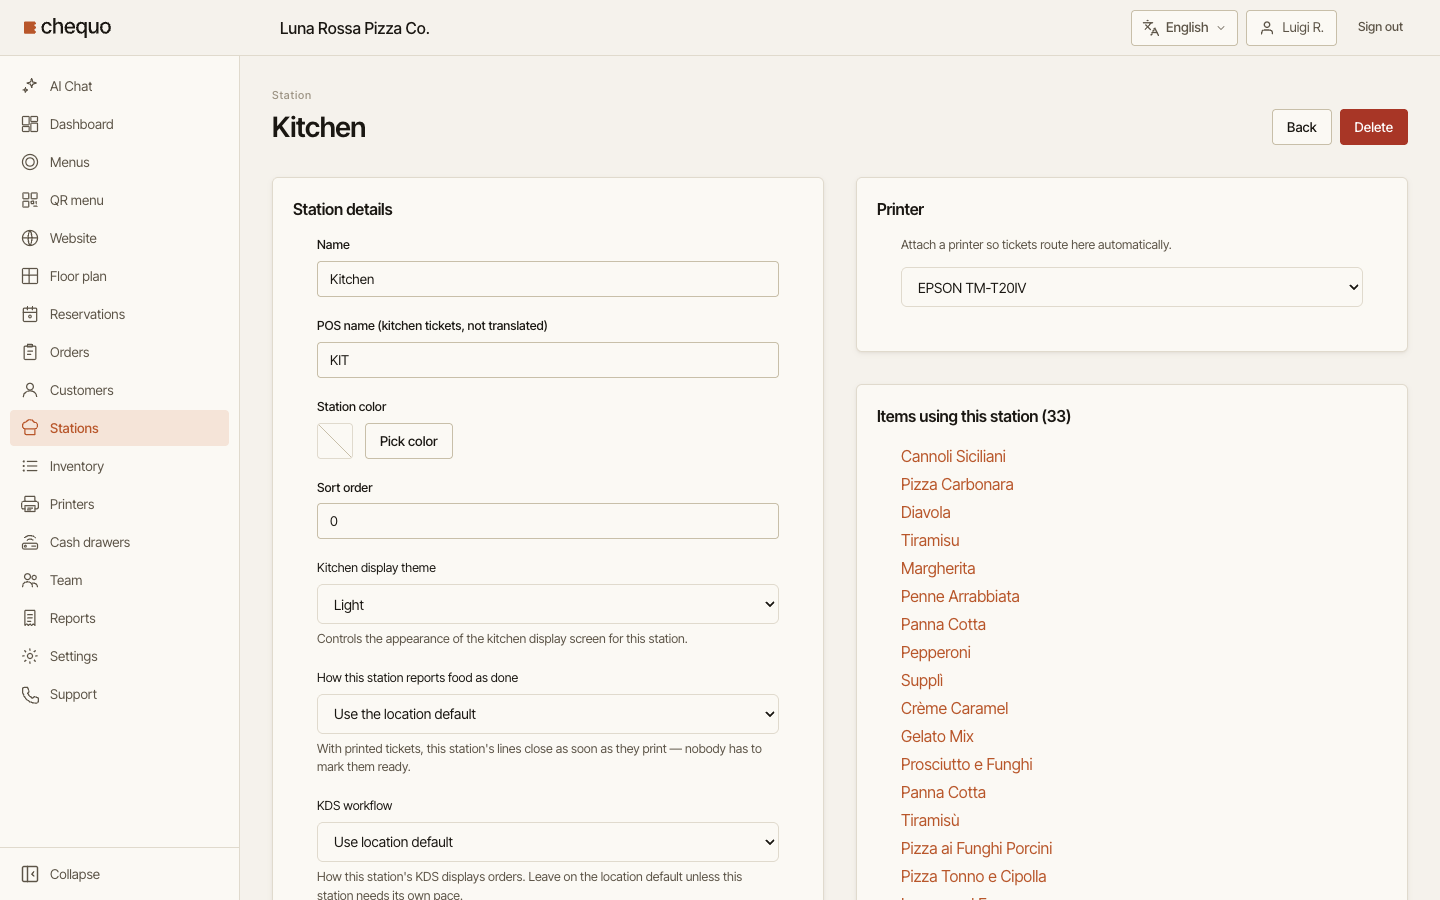
Tickets for that station now print on that printer. Pick — None — to stop printing them.
Troubleshooting
The tablet doesn't find the printer
- Check the printer is switched on and connected to the network. Most printers can print a status page showing their network details.
- Check the tablet and the printer are on the same Wi-Fi network, not one on the main network and the other on a guest network.
- Some routers stop devices on the same Wi-Fi from talking to each other. This is often called guest mode, client isolation or AP isolation. Turn it off for the network your tablets and printers use.
- Some routers block the messages printers use to announce themselves on the network. If the printer is connected and still never appears, ask whoever looks after your network to check this.
Nothing prints, and there is no error
If the printer is an EPSON, Secure Printing is most likely still on. Open the printer's settings page in a browser on the same network, go to Print → Secure Printing → Disable → Send, and try again.
The back office test print isn't picked up
The back office only queues the print. A staff tablet at the restaurant has to pick it up and send it to the printer. Open the staff app on a tablet at the restaurant, check it is online, and click Test print again.
One printer stopped printing
Open the printer in the back office and check it is Active. Then check its IP address: if your router gave the printer a new address, update it here and click Save.