Set up staff members
Every person who works a shift needs a staff member profile. That profile gives them a PIN to sign in to the staff app and the kitchen display, and it's where you record their positions, the hours they're available, and their pay. This page walks through adding someone and filling in their details.
You'll find your staff under Team → Personnel in the left-hand menu.
Add a staff member
- Go to Team → Personnel and press Add staff (top right).
- Fill in the form:
- Name — required.
- Email — optional.
- PIN (4+ digits) — required. This is the code they'll type to sign in on the staff app. Each PIN must be different from every other active staff member's at this location.
- Access level — Staff, Manager or Owner. This sets what the person is allowed to do in the staff app. Most people are Staff; choose Manager or Owner for people who need to approve or override actions.
- Positions — tick the jobs this person can work (Waiter, Cook, Bartender…). Positions come from your positions list; if it's empty, add them first under Team → Labor settings.
- Press Add staff. They can sign in right away with their PIN.
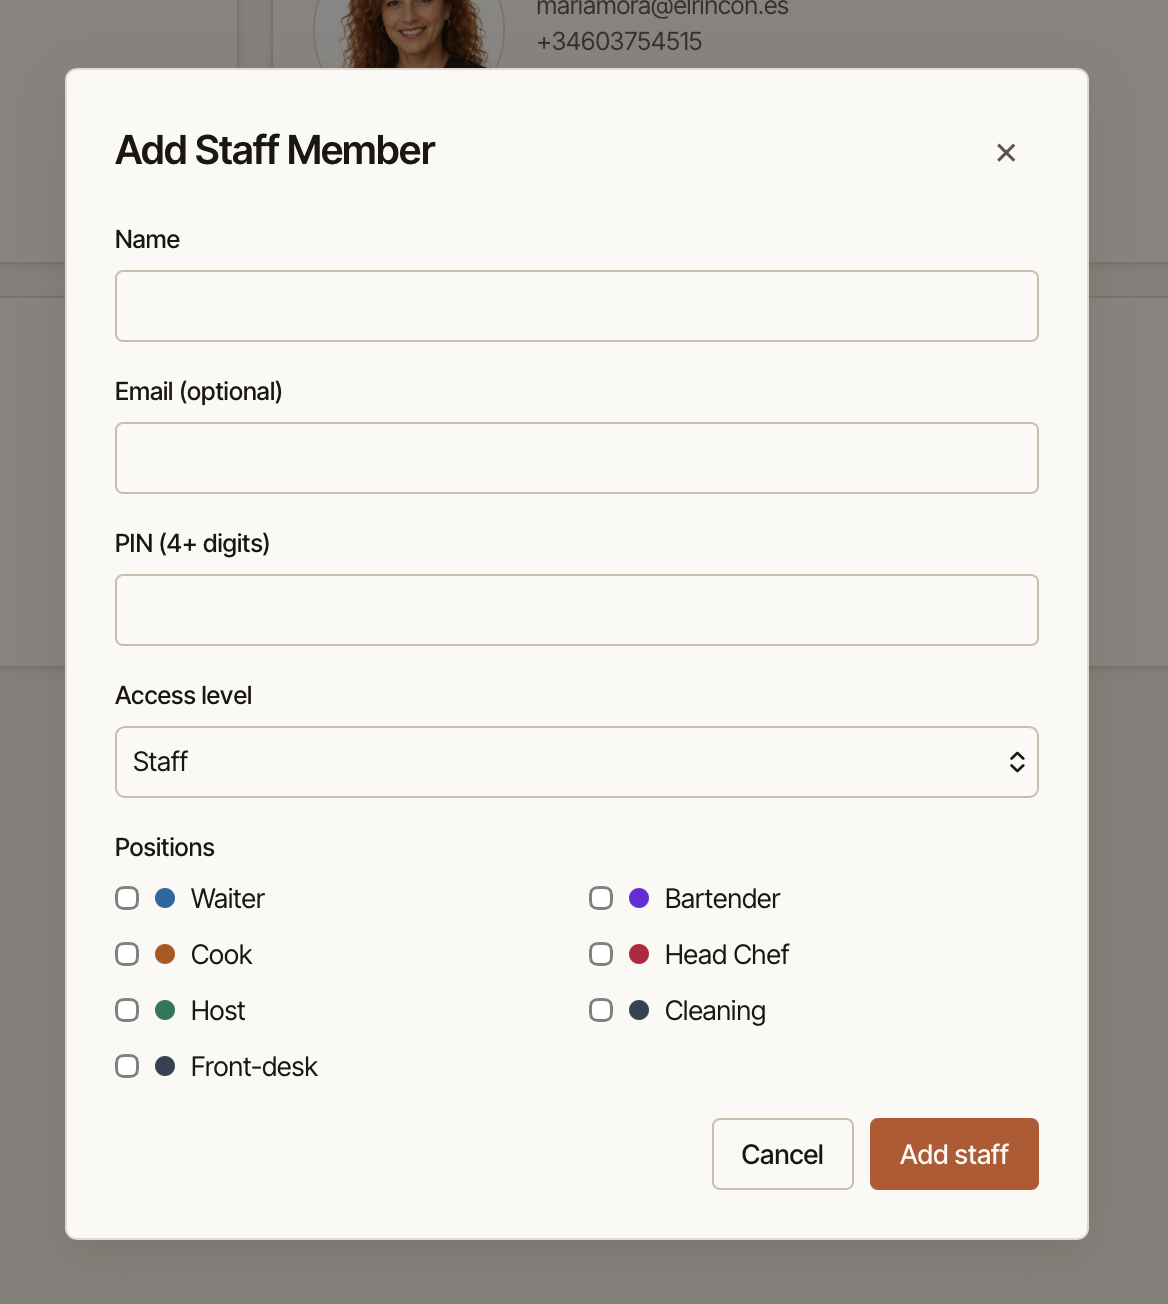
The add form only captures the basics. Everything else — photo, availability, pay and contract — is filled in afterwards by opening the staff member, below.
Open a staff member to edit details
From Personnel, press Edit on any staff member (or their name). Their profile is organised into three cards, and each card saves on its own — press the Save button in a card after changing it.
Details
- Add or change a photo (on a phone you can take it straight from the camera).
- Edit the Name, Email, Access level and Positions.
- Set a New PIN — leave this blank to keep the current one.
- Press Save details.
Availability — the hours someone can work
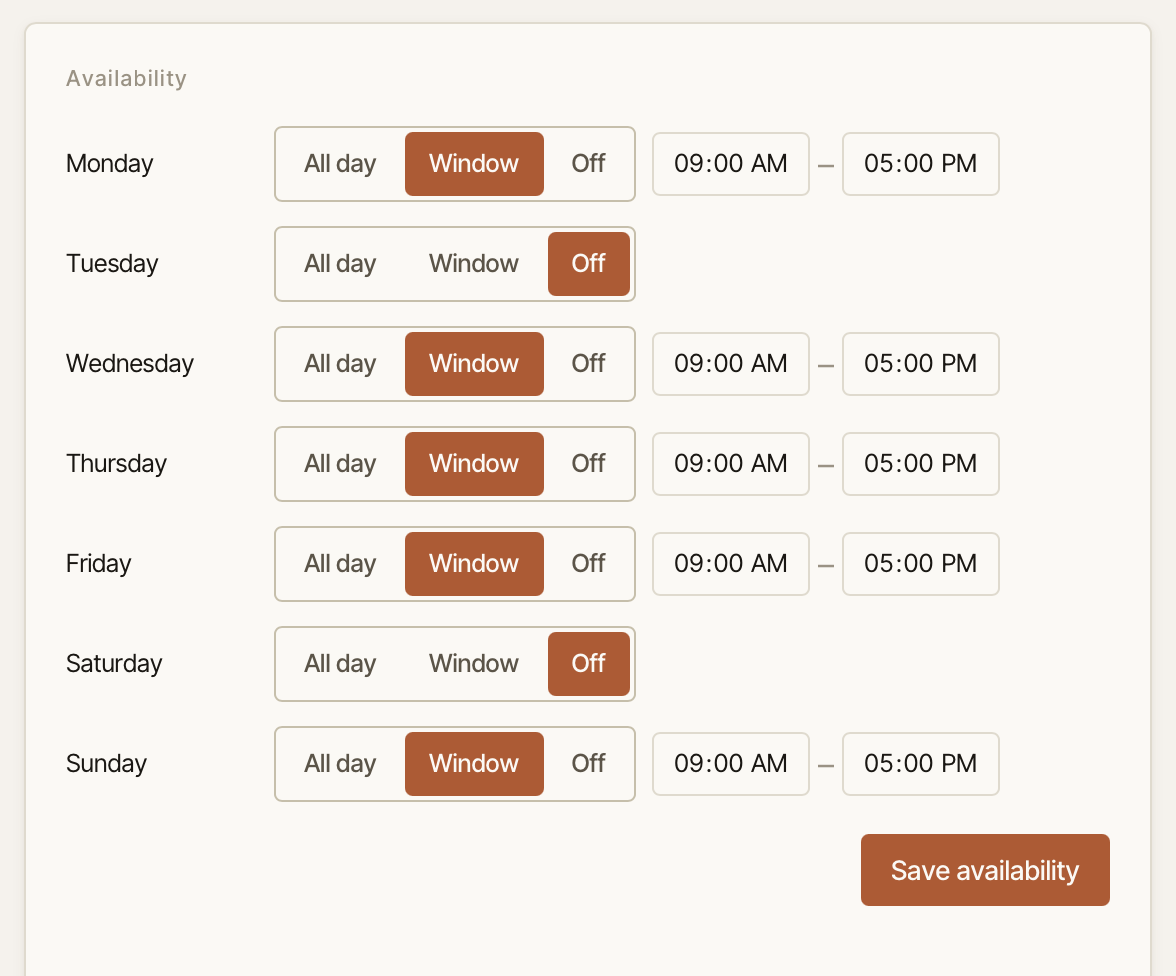
The Availability card records the hours each person is normally free to work. It's a guide for scheduling: when you build the schedule, Chequo warns you if you book someone outside these hours, so you don't accidentally roster someone who can't come in.
There's one row per day of the week. For each day, choose one of:
- All day — available any time that day (this is the default for every day).
- Window — available only between two times. Two time boxes appear; set the from and to times.
- Off — not available that day at all.
Press Save availability when you're done. You only need to change the days that aren't "all day" — anything you leave alone stays fully available.
Employment — pay and contract
The Employment card holds pay and contract details. These are optional, but filling them in lets Chequo estimate labor cost on the schedule and on timesheets, and track holiday. Fields include:
- Tax ID (NIF / codice fiscale)
- Employment type — Hourly, Daily or Salaried
- Contract type — Full time, Part time or Temporary
- Pay rate — an Hourly rate, Daily rate or Annual salary, depending on the employment type
- Contracted weekly hours — used to compare scheduled hours against the contract
- Annual vacation days — the holiday allowance used for time-off balance tracking
- Overtime multiplier — how much an overtime hour is worth (e.g. 1.5×)
- Contract start and Contract end dates
- Phone and Emergency contact
Press Save employment to store them.
Turn a staff member off (and back on)
When someone leaves, you don't delete them — you deactivate them, which keeps their history intact. On Personnel, press Deactivate on their row and confirm. They can no longer sign in to the staff app or kitchen display.
To bring someone back, switch the status filter at the top to Not active, find them, and press Re-activate.